How to Measure Photo Frame Size: The Complete Guide
Author: Jesintha Lewis
Date: March 7, 2025
Introduction
Struggling to fit your cherished photos into frames that just don't seem right? You're not alone. Improperly measured frames can ruin the presentation of your precious memories, leading to cropped images, unsightly gaps, or wasted money on returns and replacements. The frustration of purchasing a frame only to discover your photo doesn't fit properly is all too common.
Fortunately, mastering the art of measuring photo frame size is simpler than you might think—and this comprehensive guide will walk you through every step of the process. Whether you're a professional photographer looking to display your work, a home decorator seeking the perfect wall arrangement, or simply someone who wants to showcase family memories, understanding how to measure photo frame size correctly is an essential skill that will save you time, money, and frustration.
Table of Contents
Understanding Photo Frame Measurements
What Exactly Are We Measuring?
When discussing how to measure photo frame size, it's essential to understand the three key measurements that professionals consider:
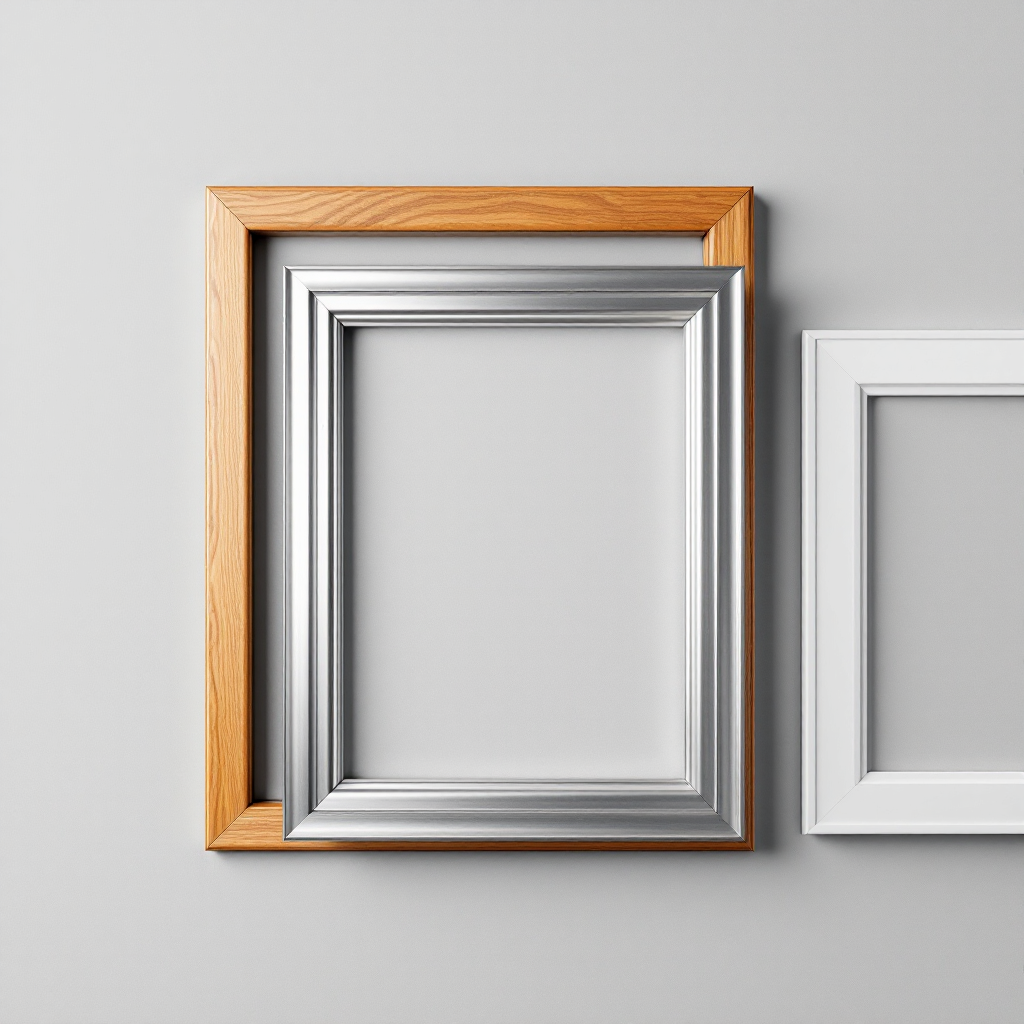
Outside Dimensions - The total external size of the frame from edge to edge, including the frame molding. This measurement matters for wall space planning and arrangements.
Inside Dimensions - The opening where your photo will be visible (sometimes called the "sight size"). This determines what portion of your image will be seen.
Rebate Size - The recessed area that holds the glass, mat, and photo (also called the "rabbet"). This determines the depth available for your framing materials.
Many measurement frustrations stem from confusion about which dimension to measure. A frame advertised as 8x10 inches typically refers to the size of the photo it holds—not the frame's external dimensions or the visible opening.
Standard vs. Actual Measurements
Frame sizes are usually described by the photo size they accommodate, which can be misleading for newcomers to framing. For example, a "5x7" frame doesn't have actual external dimensions of 5x7 inches—it's designed to hold a 5x7 inch photo, but the frame itself will be larger.
The difference between a frame's stated size and its actual dimensions varies depending on:
Frame style: Ornate frames have wider moldings than minimalist designs
Frame material: Wooden frames typically have more substantial moldings than metal frames
Manufacturer standards: Some brands include more overlap than others
Professional framers understand that a standard 8x10 frame might actually measure 9.5x11.5 inches or more on the outside, depending on the molding width.
Aspect Ratio and Its Importance
Another critical concept in frame measurement is aspect ratio—the proportional relationship between width and height. Common photographic aspect ratios include:
3:2 (standard for many DSLR cameras)
4:3 (common in point-and-shoot cameras)
1:1 (square, popular in social media)
Understanding aspect ratios helps explain why some photos don't fit standard frames without cropping. For example, a photo taken with a standard DSLR camera (3:2 ratio) won't perfectly fit an 8x10 frame (4:5 ratio) without some adjustment.
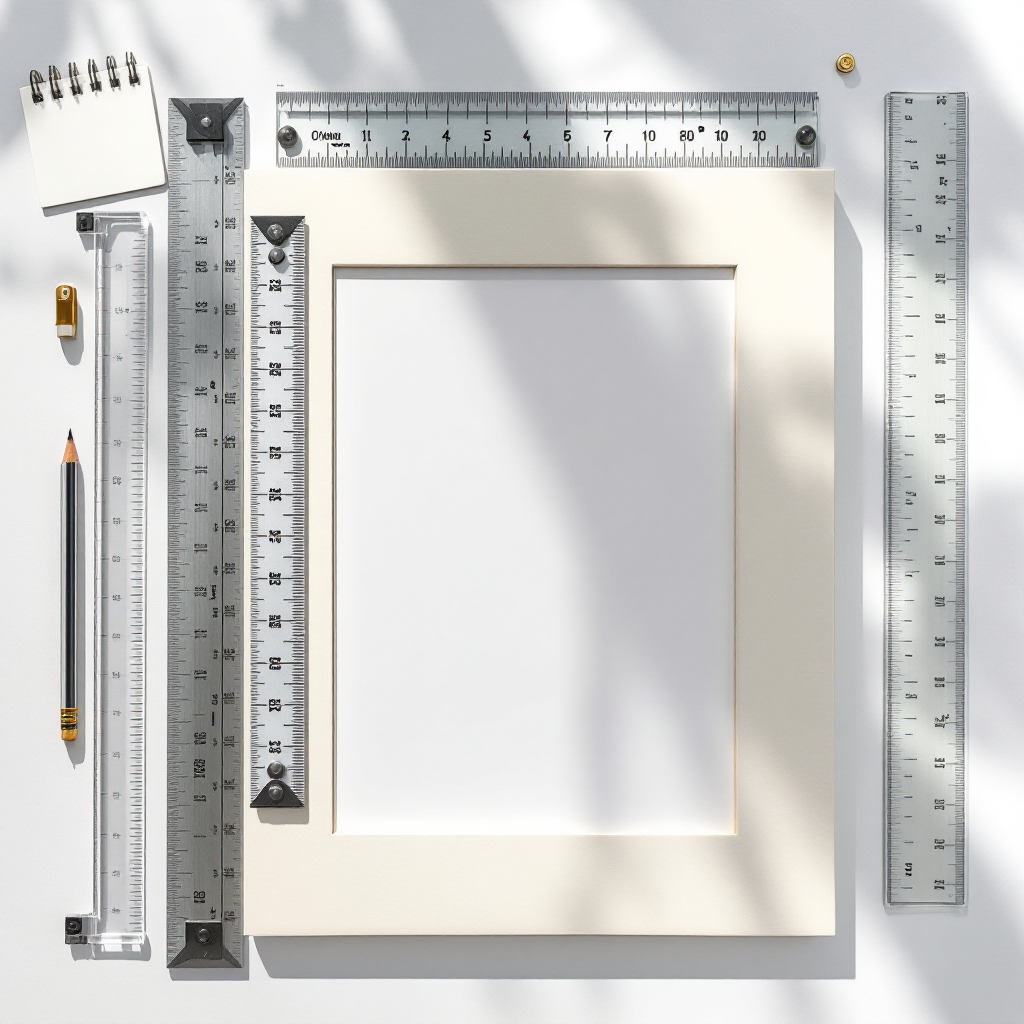
Essential Tools for Measuring Frames
Basic Measurement Tools You'll Need
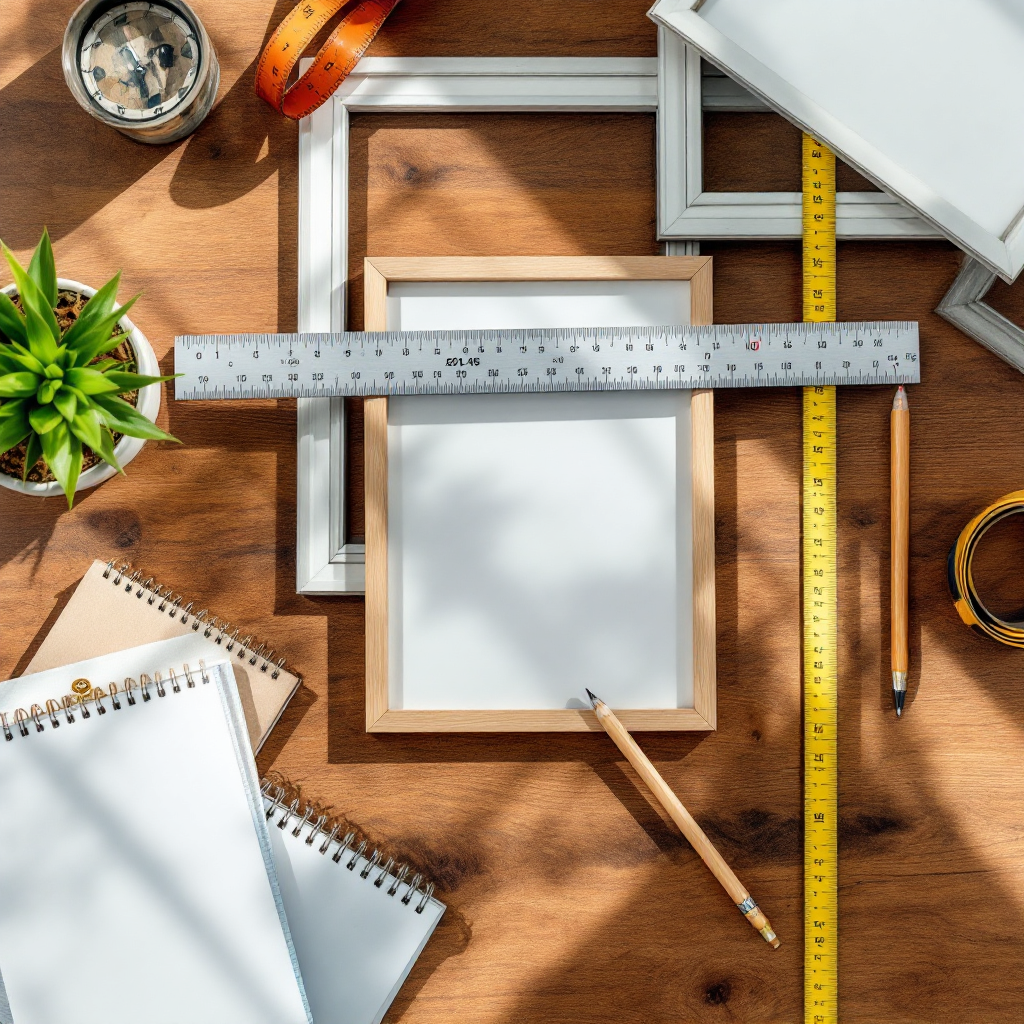
To accurately measure photo frame sizes like a professional, gather these essential tools:
Measuring tape or ruler (preferably metal with clear markings in both inches and centimeters)
Right angle or square (for ensuring accurate corners and alignment)
Notepad and pencil (for recording measurements precisely)
Calculator (for converting between measurement systems and calculating mat requirements)
Calipers (optional but helpful for precise measurements of rebate depth)
For the most accurate results, use tools with clear markings down to at least 1/16 of an inch or 1mm. Fabric measuring tapes should be avoided as they can stretch over time, leading to inaccurate measurements.
Digital Measurement Options
For tech-savvy individuals, several smartphone apps and digital tools can help measure frames with precision:
Photo measurement apps that use your camera and reference objects to determine dimensions
Digital calipers that connect to your device for ultra-precise measurements
AR (Augmented Reality) measuring tools that can visualize frames on your walls
Laser measuring devices for accurate distance measurements
Digital solutions can be particularly helpful when measuring multiple frames or creating complex gallery wall arrangements. Apps like "Photo Measures" or "AR Ruler" allow you to save measurements directly to your phone, eliminating the need for written notes.
Professional Framing Tools
For those serious about framing, these professional tools offer enhanced precision:
Point driver (for securing the backing without damaging it)
Mat cutter (for creating custom-sized mats)
Frame clamps (for holding frame pieces during assembly)
Logan mat board sizer (for professional-grade mat cutting)
While these specialized tools aren't necessary for basic measurements, they become invaluable for frequent framers and DIY enthusiasts.
How to Measure Standard Photo Frame Sizes
Step-by-Step Measurement Process
Follow this detailed process to ensure accurate measurements every time:
Place the frame face-down on a flat, clean surface
Ensure the surface is level and well-lit
Remove any dust or debris that might interfere with measurements
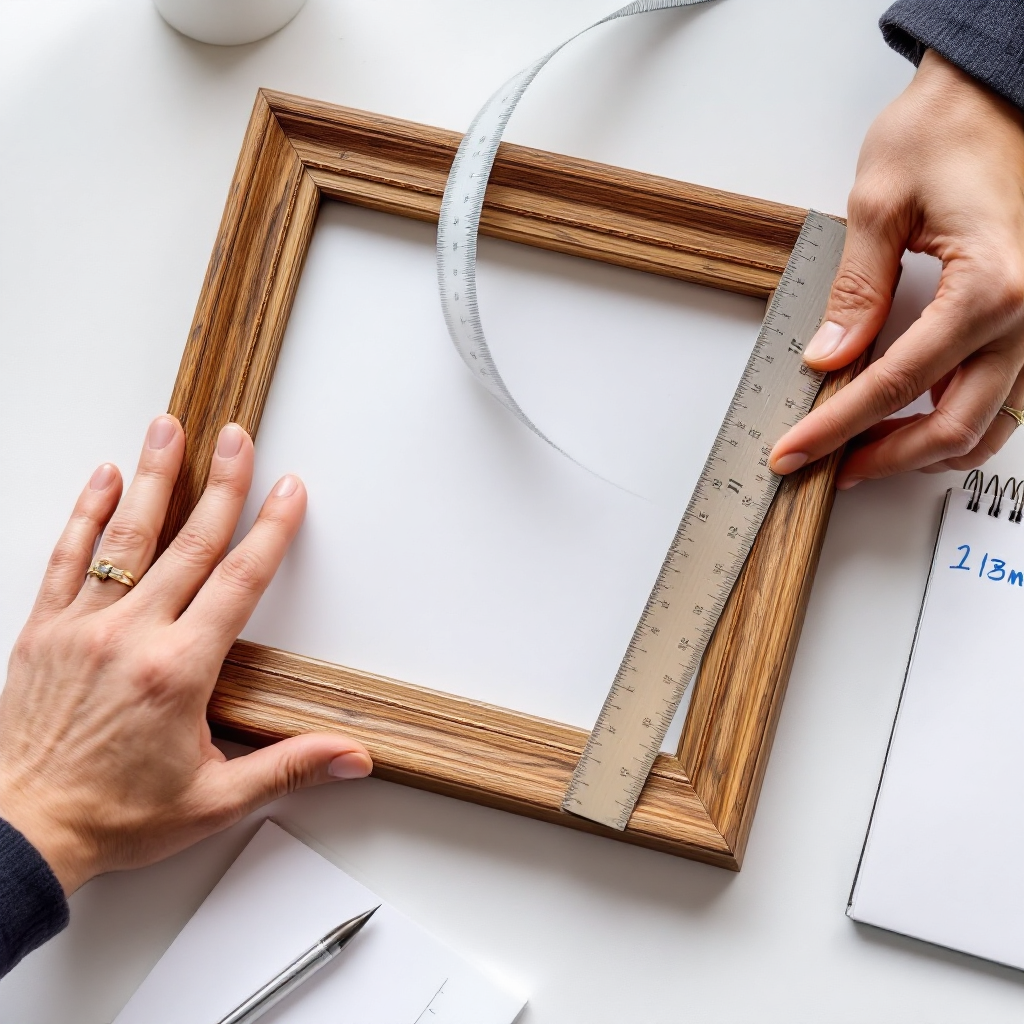
Measure the inside opening from edge to edge (both width and height)
Place your measuring tool against the inside edge
Measure from the innermost point on one side to the innermost point on the opposite side
Record both width and height measurements separately
Measure the rebate depth (how deep the frame is)
Use a small ruler or caliper to measure from the back of the frame to the glass support ledge
This determines how much thickness (photo + mat + backing) the frame can accommodate
Measure the outside dimensions (total frame size)
Place your measuring tool at the outermost edge on one side
Measure to the outermost edge on the opposite side
Record both the total width and height
Record all measurements carefully, noting which is which
Use a consistent format: Width × Height × Depth
Include units (inches or centimeters) with each measurement
Note any irregularities or variations
For the most accurate results, take each measurement twice and compare. If there's any discrepancy, measure a third time to confirm.
Understanding Frame Size Notation
Frame sizes are typically written as width × height (W×H). For example, an 8×10 inch frame means it's 8 inches wide and 10 inches tall. Always maintain this order for clarity and consistency in your measurements.
Professional framers and manufacturers use this standard notation globally, though the units may vary (inches in the US, centimeters in most other countries). When ordering frames online or communicating with framing professionals, maintaining this consistent width-first notation prevents costly mistakes.
Common Standard Frame Sizes
The most common photo frame sizes in inches include:
4×6 (for standard print photos)
5×7 (for slightly larger prints)
8×10 (popular for portraits)
11×14 (common for larger family photos)
16×20 (frequently used for significant portraits or artwork)
20×24 (suitable for statement pieces)
24×36 (poster size)
For metric measurements, common sizes in centimeters include:
10×15 (equivalent to 4×6 inches)
13×18 (equivalent to 5×7 inches)
20×25 (equivalent to 8×10 inches)
30×40 (equivalent to 11×14 inches)
40×50 (equivalent to 16×20 inches)
50×60 (equivalent to 20×24 inches)
Manufacturers typically produce frames in these standard sizes because they correspond to common photo printing dimensions. Using standard sizes whenever possible saves money compared to custom framing options.
Measure the diameter across the widest point of the opening
Also measure the outside diameter of the entire frame
Note the depth of the rebate for glass and photo thickness
For oval frames:
Measure both the major axis (longest dimension) and minor axis (shortest dimension)
Take measurements at the widest and tallest points
Record as "major axis × minor axis" (e.g., 8×10 oval)
For irregular shapes:
Consider creating a template using paper or cardboard
Trace the inside opening precisely
Cut out the template and test it against your photo
For complex shapes, measure multiple points and create a diagram
For multi-opening frames:
Measure each opening individually
Record the relative positions of each opening
Note the overall dimensions of the entire frame
Professional framers often use specialized techniques for unique shapes, including digital scanning and templating for perfectly fitted mats and backing.
Measuring for Custom Framing
When preparing for custom framing, precision becomes even more critical:
Measure your artwork precisely (including any borders you want visible)
For artwork on paper, include any signatures or important margins
For canvas, measure the full dimensions including the wrapped edges if they're painted
For three-dimensional objects, measure height, width, and depth
Determine desired mat width (typically 2-4 inches on each side)
Larger artwork generally benefits from wider mats
Consider weighted bottom mats (slightly wider at the bottom) for a professional look
For valuable artwork, consider museum-quality conservation mats
Calculate the required inside dimension of the frame
Add twice the mat width to both the height and width of your artwork
Example: An 8×10 photo with a 2-inch mat requires a frame with a 12×14 inch opening
Consider frame molding width in your calculations
Determine how much of the molding will be visible from the front
Choose wider moldings for larger pieces to maintain visual balance
Factor in the weight of the frame for proper hanging hardware
Account for mounting methods
Float mounting (where the artwork appears to float on the mat) requires additional space
Shadowbox framing needs sufficient depth for three-dimensional objects
Double-matting requires space for multiple layers
Custom framing allows for perfect presentation but comes at a premium price. For valuable artwork or unique sizes, the investment in professional custom framing often proves worthwhile.
Understanding Mat Sizes and Measurements
How Mats Affect Frame Measurements
Mats serve both aesthetic and preservation purposes, creating a visual border around your photo while preventing the artwork from touching the glass. Understanding mat measurements is crucial:
Standard mat borders are typically 2-3 inches wide
Wider mats create more visual impact and formal appearance
Narrower mats (1-2 inches) are more casual and economical
Museum-quality presentations often use wider mats (3-4 inches)
Bottom-weighted mats have a slightly larger bottom border
Typically 1/4 to 1/2 inch wider at the bottom
Creates visual stability and a professional look
Example: A mat might be 2 inches on top and sides, but 2.5 inches on the bottom
Double mats feature two layers with the top mat revealing a thin border of the bottom mat
The exposed bottom mat typically shows 1/4 to 1/2 inch
A 5×7 photo with a 2-inch mat requires a frame with 9×11 inch opening (5+2+2=9 and 7+2+2=11)
An 8×10 photo with a 3-inch mat requires a frame with 14×16 inch opening (8+3+3=14 and 10+3+3=16)
A 4×6 photo with a 1.5-inch mat requires a frame with 7×9 inch opening (4+1.5+1.5=7 and 6+1.5+1.5=9)
For double mats:
Calculate using the same method, accounting for the combined thickness
The bottom mat is typically cut 1/4 to 1/2 inch larger than the top mat on all sides
For multiple photos in one frame:
Calculate the overall dimensions needed for all photos plus spacing
Allow at least 1-2 inches between photos
Add the exterior mat border to the total arrangement size
Pre-cut mats are available in standard sizes, while custom mats can be created for any dimension. Professional framing shops can cut precise mats to specification, ensuring perfect presentation of your photos and artwork.
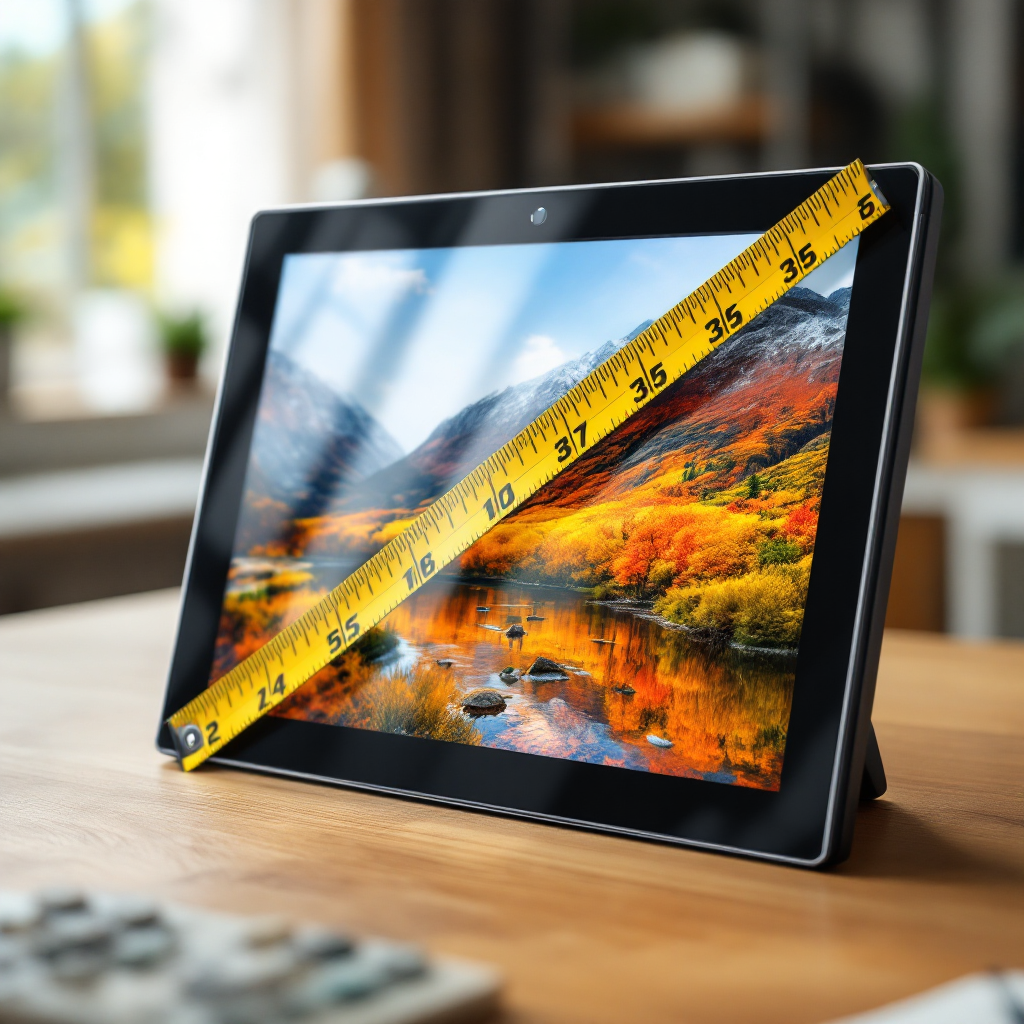
Digital Photo Frame Size Considerations
How to Measure Size of Digital Photo Frames
Digital frames have unique measurement considerations compared to traditional frames:
Screen size is measured diagonally, like televisions
A 10-inch digital frame has a screen that measures 10 inches from corner to corner
The actual viewing area may be slightly smaller due to the bezel (frame border)
Larger screens (12-15 inches) provide better visibility from a distance
Aspect ratio determines the proportions of displayed images
Common digital frame ratios include 4:3, 16:9, and 16:10
Photos not matching the native aspect ratio may display with black bars or cropping
Understanding your frame's aspect ratio helps you prepare images appropriately
Resolution affects image clarity and detail
Measured in pixels (width × height)
Higher resolution displays (1920×1080 or higher) show finer details
Resolution becomes more important as screen size increases
Physical dimensions
Consider the total width, height, and depth for placement purposes
Measure any stands or mounting brackets that affect positioning
Factor in power cord placement for clean installation
Digital frames with smart features may require additional considerations like Wi-Fi connectivity, cloud storage access, and smartphone compatibility.
Matching Digital Photos to Frame Dimensions
To ensure your digital photos display properly:
Check the native resolution of your digital frame
This information is typically found in the product specifications
Example: 1280×800 pixels (a common resolution for mid-range digital frames)
Resize your images to match this resolution
Use photo editing software to adjust dimensions
Maintain the correct aspect ratio to prevent distortion
Avoid upscaling low-resolution photos, which can appear pixelated
Maintain the correct aspect ratio to avoid distortion
If your photos don't match the frame's aspect ratio, consider cropping them
Alternatively, some digital frames allow zooming or panning options
Photo editing software can help you crop to the exact aspect ratio needed
Optimize file formats and sizes
Most digital frames support JPEG, with some accepting PNG or other formats
Check your frame's supported formats and maximum file size limits
Consider batch processing tools for preparing multiple photos efficiently
Color calibration considerations
Digital frames may display colors differently than your computer monitor
Consider adjusting brightness, contrast, and color saturation accordingly
Some premium digital frames offer color adjustment settings
For optimal results, create a test folder with a few sample images before preparing your entire collection.
Common Measurement Mistakes to Avoid
Overlooking the Difference Between Photo and Frame Size
The most common mistake is confusing the photo size with the frame size. Remember that:
Frame size labels typically refer to the photo they hold
An "8×10 frame" is designed for an 8×10 photo, not 8×10 external dimensions
The actual frame will be larger, often by 1-2 inches in each dimension
Actual frame dimensions will be larger than the stated size
External dimensions include the frame molding width
Frame molding can vary from 1/4 inch to several inches wide
Visible photo area may be smaller than photo dimensions
The frame lip typically overlaps the photo edge by 1/8 to 1/4 inch
This overlap secures the photo but reduces visible area slightly
To avoid this confusion, always clarify which dimension you're referring to: photo size, visible opening, or external frame dimensions.
Forgetting About Depth Requirements
Don't forget to consider depth:
Standard frames typically accommodate photos and thin mats
Most have a rebate depth of 1/4 to 3/8 inch
Suitable for photos, prints, and flat artwork
Shadow boxes provide additional depth for dimensional items
Depths range from 1/2 inch to 3 inches or more
Necessary for framing medals, dried flowers, fabric art, or other 3D objects
Gallery frames may have specific depth requirements
Canvas frames need depth for stretcher bars (typically 3/4 to 1.5 inches)
Float frames require precise depth measurements for proper display
Inadequate depth can result in buckling materials, improper assembly, or inability to secure the frame backing properly.
Not Accounting for the Mat
When purchasing pre-cut mats:
Ensure the mat's outside dimensions match your frame's inside dimensions
Even 1/8 inch discrepancy can prevent proper fitting
Some frames have irregular inside dimensions due to manufacturing variations
Verify the mat's inside opening is slightly smaller than your photo (typically 1/4 inch smaller on each side)
This creates an overlap that holds the photo in place
Too small an opening covers too much of your image
Too large an opening may allow the photo to slip
Consider mat thickness for the frame rebate
Standard mats are typically 4-ply (approximately 1/16 inch thick)
Conservation mats may be 8-ply (approximately 1/8 inch thick)
Double mats require twice the depth
Professional framers always account for these small but crucial details to ensure perfect presentation.
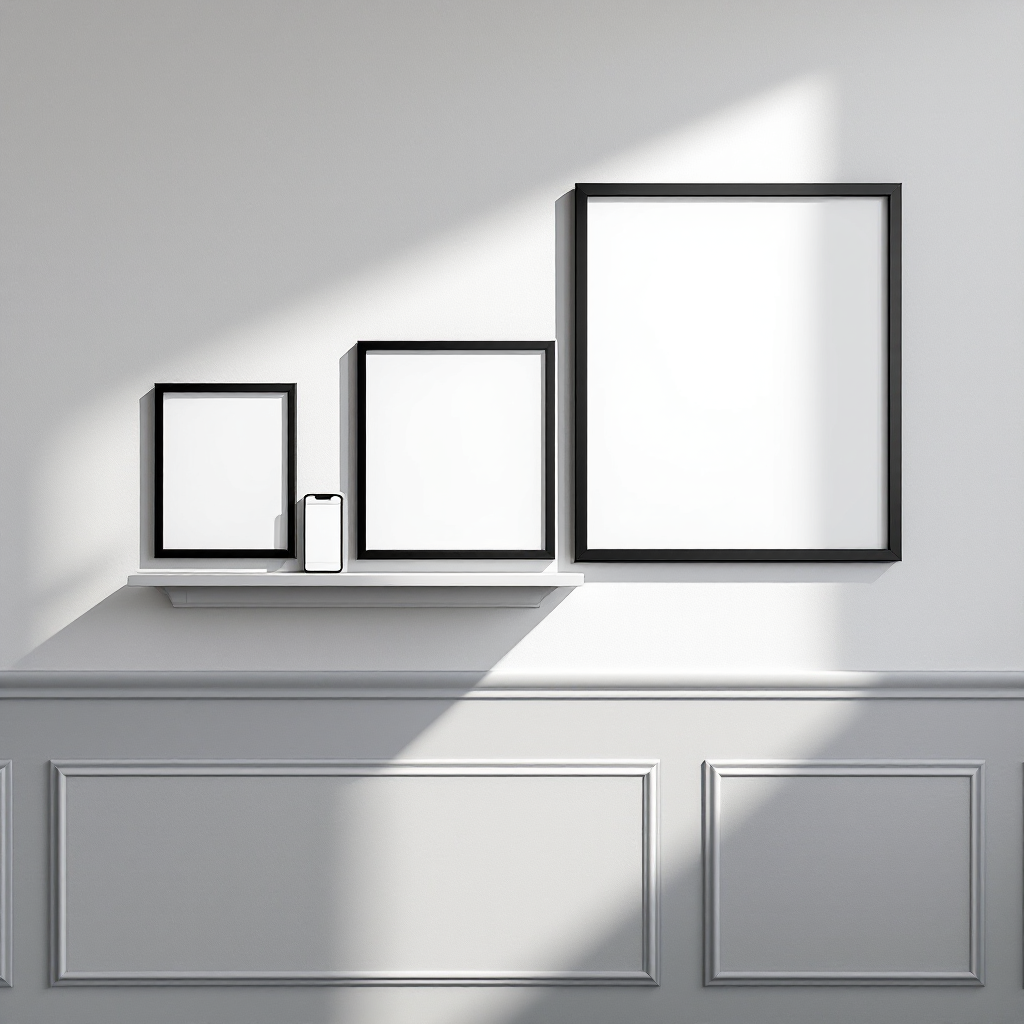
Measuring Without Considering Hanging Hardware
Another common oversight involves hanging considerations:
Wall space requirements may exceed frame dimensions
Allow adequate space around frames in gallery arrangements
Consider balance and symmetry in multi-frame displays
Most frames have hardware positioned 1/3 down from the top
Measure from the hardware to the top of the frame to determine hanging height
Frame weight influences hardware requirements
Heavier frames need sturdier wall anchors
Glass adds significant weight compared to acrylic
Always factor in these practical considerations alongside precise measurements for successful frame installation.
Frame Size Measurement Chart
Standard Photo Sizes and Corresponding Frame Dimensions
Photo Size (inches)
Mat Border (inches)
Required Frame Opening (inches)
Typical External Frame Size (inches)
4×6
No mat
4×6
5.5×7.5
4×6
2-inch mat
8×10
9.5×11.5
5×7
No mat
5×7
6.5×8.5
5×7
2-inch mat
9×11
10.5×12.5
8×10
No mat
8×10
9.5×11.5
8×10
2-inch mat
12×14
13.5×15.5
11×14
No mat
11×14
12.5×15.5
11×14
2-inch mat
15×18
16.5×19.5
16×20
No mat
16×20
17.5×21.5
16×20
2-inch mat
20×24
21.5×25.5
Metric Conversion Chart
Photo Size (cm)
Mat Border (cm)
Required Frame Opening (cm)
Typical External Frame Size (cm)
10×15
No mat
10×15
13×18
10×15
5 cm mat
20×25
23×28
13×18
No mat
13×18
16×21
13×18
5 cm mat
23×28
26×31
20×25
No mat
20×25
23×28
20×25
5 cm mat
30×35
33×38
30×40
No mat
30×40
33×43
30×40
5 cm mat
40×50
43×53
40×50
No mat
40×50
43×53
40×50
5 cm mat
50×60
53×63
Specialized Frame Size Chart
Application
Common Sizes (inches)
Common Sizes (cm)
Notes
Instagram Prints
4×4, 5×5, 8×8
10×10, 13×13, 20×20
Square format
Panoramic Photos
4×12, 8×24, 12×36
10×30, 20×60, 30×90
3:1 aspect ratio
Diploma Frames
8.5×11, 11×14, 11×17
21×28, 28×36, 28×43
Standard document sizes
Sports Jerseys
30×36, 32×40
76×92, 81×102
Shadowbox style
Movie Posters
24×36, 27×40
61×92, 69×102
Standard theater poster sizes
Converting Between Measurement Systems
Inches to Centimeters Conversion
To convert inches to centimeters, multiply by 2.54:
8×10 inches = 20.32×25.4 centimeters
5×7 inches = 12.7×17.78 centimeters
11×14 inches = 27.94×35.56 centimeters
This conversion is essential when purchasing frames internationally or when working with metric-based suppliers.
Centimeters to Inches Conversion
To convert centimeters to inches, divide by 2.54:
20×30 centimeters = 7.87×11.81 inches
13×18 centimeters = 5.12×7.09 inches
50×70 centimeters = 19.69×27.56 inches
For practical purposes, these might be rounded to the nearest standard size (e.g., 13×18 cm is approximately 5×7 inches).
Practical Tips for International Measurements
Round to the nearest standard size when converting between systems
Instead of ordering a 20.32×25.4 cm frame, opt for the standard 20×25 cm size
Slight variations can be accommodated with proper matting
Consider purchasing frames designed for your measurement system to avoid odd dimensions
North American retailers typically stock inch-based sizes
European and Asian retailers typically stock centimeter-based sizes
Custom framing can accommodate precise measurements in any system
Professional framers can work with exact dimensions regardless of unit
Specify your preferred measurement system when ordering custom frames
Maintain consistency within a single project
Don't mix measurement systems within one framing project
Convert all measurements to a single system for clarity
Use conversion apps for on-the-spot calculations
Smartphone calculators and measurement apps offer instant conversions
Digital calipers often display both inches and centimeters simultaneously
Understanding both systems provides flexibility when sourcing frames internationally or working with global suppliers.
FAQs About Measuring Photo Frame Sizes
How do I measure a photo frame size in inches?
To measure a photo frame size in inches:
Use a ruler or measuring tape with inch markings
Measure the inside opening width and height (from one inner edge to the opposite inner edge)
Also measure the outside dimensions for placement planning (from one outer edge to the opposite outer edge)
Note the measurements as width × height (horizontal measurement first, then vertical)
For complete specifications, also measure the depth of the frame's rebate (where the photo sits)
Remember that precision matters—measure to the nearest 1/16 inch for best results. For antique or valuable frames, consider consulting a professional framer for the most accurate measurements.
What's the difference between frame size and photo size?
The frame size refers to the entire frame's dimensions, while photo size indicates the dimensions of the image the frame is designed to hold. This distinction is crucial for proper framing:
When a frame is labeled as 8×10, it means it holds an 8×10 inch photo, not that the frame itself is 8×10 inches
The external frame dimensions will be larger than the photo size by at least the width of the frame molding on all sides
The visible portion of your photo may be slightly smaller than its actual dimensions due to the frame overlap (typically 1/8 to 1/4 inch on each side)
Professional framers always specify whether they're referring to the photo size, visible opening, or external dimensions to avoid confusion.
How do I measure photo frames for image size?
To determine how to measure photo frames for image size:
Measure the inside opening of the frame (the visible area)
Place your ruler along the inside edge of the frame
Measure from edge to edge horizontally and vertically
If there's a mat, measure the opening in the mat
The mat opening is the actual visible area of your photo
This dimension is critical for proper photo sizing
Your photo should be slightly larger than this measurement (about 1/4 inch larger on each side) to be held securely behind the mat
Example: For a mat opening of 7.5×9.5 inches, your photo should be 8×10 inches
This overlap prevents the photo from falling through the opening
For frameless clip frames or glass frames, measure the exact glass size
Your photo should match these dimensions precisely
No overlap is needed since these frames use clips or pressure to hold everything in place
Understanding these relationships ensures your photos fit properly within your chosen frames.
How do I know what size frame I need for my photo?
To determine the frame size needed:
Measure your photo's exact dimensions
Use a ruler on a flat surface for accuracy
Note both width and height in the same unit (inches or centimeters)
Decide if you want to use a mat (add twice the mat width to both dimensions)
For a 5×7 photo with a 2-inch mat, you'll need a frame with a 9×11 inch opening
For an 8×10 photo with a 3-inch mat, you'll need a frame with a 14×16 inch opening
Choose a frame that accommodates these measurements
Look for frames specifically sized for your needs
Check both the frame's inside dimensions and rebate depth
Consider standard sizes to save money
Standard sizes are more readily available and affordable
You may need to trim your photo or use a custom mat to fit standard sizes
For valuable or irreplaceable photos
Never trim or alter original photographs
Invest in custom framing if standard sizes don't accommodate your needs
Consider conservation framing for long-term preservation
Planning ahead with these considerations saves time and ensures proper presentation of your images.
How do I measure for a digital photo frame?
For measuring the size of digital photo frames:
The size is typically listed as the diagonal screen measurement
A 10-inch digital frame has a screen measuring 10 inches diagonally
This measurement doesn't include the bezel (frame border)
Check the aspect ratio (commonly 4:3 or 16:9) to ensure your photos will display properly
4:3 ratio is closer to traditional photo print proportions
16:9 ratio matches wide-format digital photos and HD video
Photos not matching the native ratio may display with black bars or cropping
Verify the resolution to ensure your images will appear clear
Higher resolution (1920×1080 or better) provides sharper image quality
Lower resolution may appear pixelated, especially with larger screens
Consider the physical dimensions for placement
Measure the total width, height, and depth including the bezel
Factor in any stands, wall mounts, or power connections
Allow adequate space for visibility from your preferred viewing distance
Check supported file formats and storage options
Most support JPEG files, but format compatibility varies
Storage capacity affects how many photos you can load
Some frames offer cloud storage or streaming options
Digital frames offer versatility for displaying multiple images but require different measurement considerations than traditional frames.
Conclusion
Mastering how to measure photo frame size ensures your cherished memories and artwork are displayed at their best. By understanding the different measurement components, using the right tools, and following the step-by-step processes outlined in this guide, you'll save time, money, and frustration when purchasing or creating frames for your photos.
Remember that properly measured frames not only protect your photos but enhance their visual impact through correct proportions and presentation. Whether you're working with standard sizes or custom dimensions, the principles remain the same: measure carefully, account for all components, and verify before making your final decision.
The difference between amateur and professional-looking displays often comes down to precision in measurement and attention to detail. With the comprehensive information provided in this guide, you now have the knowledge to approach framing with confidence and achieve professional results.
For more framing tips, custom frame options, and a wide selection of quality frames in all sizes, explore our collection at Frameley. Our expert team is always available to assist with your specific framing needs and questions about measuring photo frame sizes for perfect results every time.