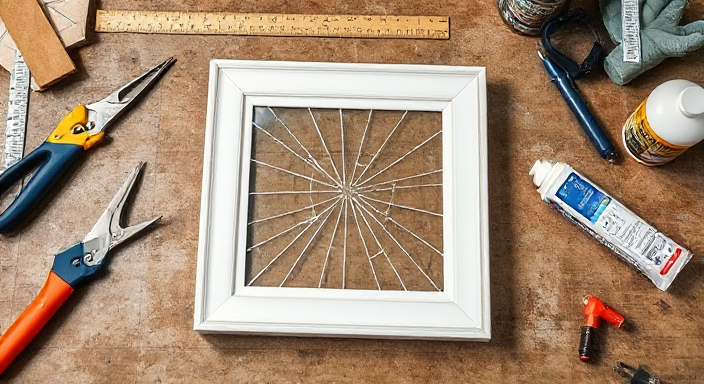
How to Fix Cracked Glass in Photo Frames at Home

Cracked glass in a photo frame can diminish its visual appeal and compromise the safety of your cherished memories. Replacing or repairing the glass doesn’t have to be a daunting task. With a few tools, materials, and some patience, you can fix or replace the glass in your photo frames at home. This guide will walk you through DIY solutions to restore your frame while preserving its charm and functionality.


Why Fix Cracked Glass in Photo Frames?

Cracked photo frame glass not only looks unsightly but can also pose risks of injury or further damage to the frame and the photo inside. Addressing the issue promptly can:

Tools and Materials You’ll Need

Before you start, gather these tools and materials:

Step 1: Assessing the Damage

Before deciding on a repair or replacement, carefully examine the extent of the damage:

Step 2: Repairing Cracked Glass

For minor cracks, follow these steps:

1. Clean the Glass

2. Secure the Crack

3. Apply Adhesive

4. Polish the Surface

Step 3: Replacing the Glass

If the glass is severely damaged, replacement is a safer and more effective solution. Follow these steps:

1. Remove the Old Glass

2. Measure for Replacement

3. Cut the Glass

4. Install the New Glass

Step 4: Creative Uses for Cracked Glass Frames

If you’re unable to repair or replace the glass, consider these creative ideas:

Step 5: Preventing Future Cracks

Prevention is better than cure. Follow these tips to keep your photo frame glass in excellent condition:

FAQs About Fixing Photo Frame Glass

Can I repair large cracks in photo frame glass?

Large cracks can be temporarily repaired using adhesive, but replacement is recommended for better durability and safety.

Where can I find replacement glass for photo frames?

You can purchase replacement glass at hardware stores, online retailers, or specialized framing shops.

What are alternatives to glass for photo frames?

Acrylic and plexiglass are excellent alternatives to traditional glass. They are lightweight, shatterproof, and offer similar clarity.

How do I maintain photo frame glass?

Final Thoughts

Fixing cracked glass in photo frames doesn’t have to be intimidating. Whether you choose to repair minor cracks, replace the glass, or repurpose the frame creatively, you can preserve your memories and enhance your home decor. With these DIY techniques, you’ll not only save money but also enjoy the satisfaction of restoring your photo frames at home. Visit Frameley for high-quality frames and expert guidance to elevate your projects.

How to Restore an Old Photo Frame: A Step-by-Step Guide

Preserving cherished memories often involves taking care of the photo frames that house them. Over time, even the most beautiful frames can lose their charm due to wear and tear. Restoring an old photo frame is a rewarding project that brings life back to your memories. This guide will walk you through a step-by-step process to rejuvenate your old frames and keep them looking stunning for years to come.

Why Restore an Old Photo Frame?

Old photo frames often hold sentimental value, serving as a gateway to precious moments. Over time, frames can become dull, chipped, or discolored, diminishing the appeal of the photos they protect. Restoring a frame not only enhances its appearance but also safeguards the memories inside.

Ignoring the wear and tear can lead to permanent damage, making restoration crucial for:

Tools and Materials You’ll Need

Before starting, gather the following tools and materials:

Step 1: Assessing the Frame’s Condition

Before diving into the restoration process, inspect the frame carefully:

This initial assessment helps you plan the restoration process effectively.

Step 2: Cleaning the Frame

Dirt and grime often accumulate on old frames. Cleaning is the first step to bring out the frame’s original details.

  1. Remove the photo and glass: Carefully take out the photo and any protective glass to avoid damage.
  2. Dust the frame: Use a soft, dry cloth to remove surface dust and debris.
  3. Clean with a gentle solution: Mix a small amount of mild soap with water and wipe the frame using a damp cloth. For intricate designs, use a soft brush.
  4. Rinse and dry: Wipe the frame with a damp cloth to remove soap residue and allow it to air dry completely.

Pro Tip: Avoid soaking wooden frames as excess moisture can cause warping.

Step 3: Repairing Damages

After cleaning, focus on repairing any damages:

  1. Fix cracks and chips:
    • Use wood glue for wooden frames or adhesive for metal and plastic frames.
    • Press the broken pieces together and secure with clamps until the glue dries.
  2. Replace missing pieces:
    • For ornate frames, mold missing sections with epoxy putty. Once dry, sand it to match the original design.
  3. Reinforce weak joints:
    • Add small nails or brackets to secure loose corners.

Step 4: Restoring the Finish

The frame’s finish plays a significant role in its appearance. Follow these steps based on the type of finish:

For Wooden Frames:

  1. Sand the surface: Use medium-grit sandpaper to remove old paint or varnish, then switch to fine-grit for a smooth finish.
  2. Apply primer: If repainting, apply a primer to ensure the paint adheres well.
  3. Paint or stain:
    • For a painted finish, use acrylic or latex paint.
    • For a natural wood look, apply wood stain followed by varnish.

For Metal Frames:

  1. Remove rust: Sand rusty areas gently until the metal is smooth.
  2. Apply metal paint: Use spray paint or a brush for even coverage.
  3. Seal the finish: Protect the metal with a clear acrylic sealant.

For Gilded or Ornate Frames:

  1. Touch up gilding: Use gold or silver leaf to restore intricate designs.
  2. Apply protective wax: Buff the surface to enhance the shine.

Step 5: Enhancing the Frame’s Design

If you’d like to modernize or customize your frame:

Step 6: Reassembling and Displaying

Once the restoration is complete, reassemble your photo frame:

  1. Clean the glass: Use a glass cleaner to remove smudges or streaks.
  2. Insert the photo: Place your photo back into the frame.
  3. Secure the backing: Ensure the photo stays in place by tightening the frame’s back.
  4. Display with pride: Choose a prominent spot to showcase your revitalized frame.

FAQs About Restoring Photo Frames

Can I restore a frame with sentimental value?

Yes, but handle it with care. Consider professional help for fragile or antique frames.

What type of paint works best for frames?

Acrylic or latex paint is ideal for most frames. For metal frames, use spray paint or specialized metal paint.

How do I prevent future damage to my frame?

Final Thoughts

Restoring an old photo frame is a satisfying project that preserves your cherished memories while giving your home decor a fresh touch. By following these steps, you can turn a worn-out frame into a beautiful, revitalized piece. Ready to get started? Head over to Frameley for high-quality frames and expert advice to elevate your restoration projects.